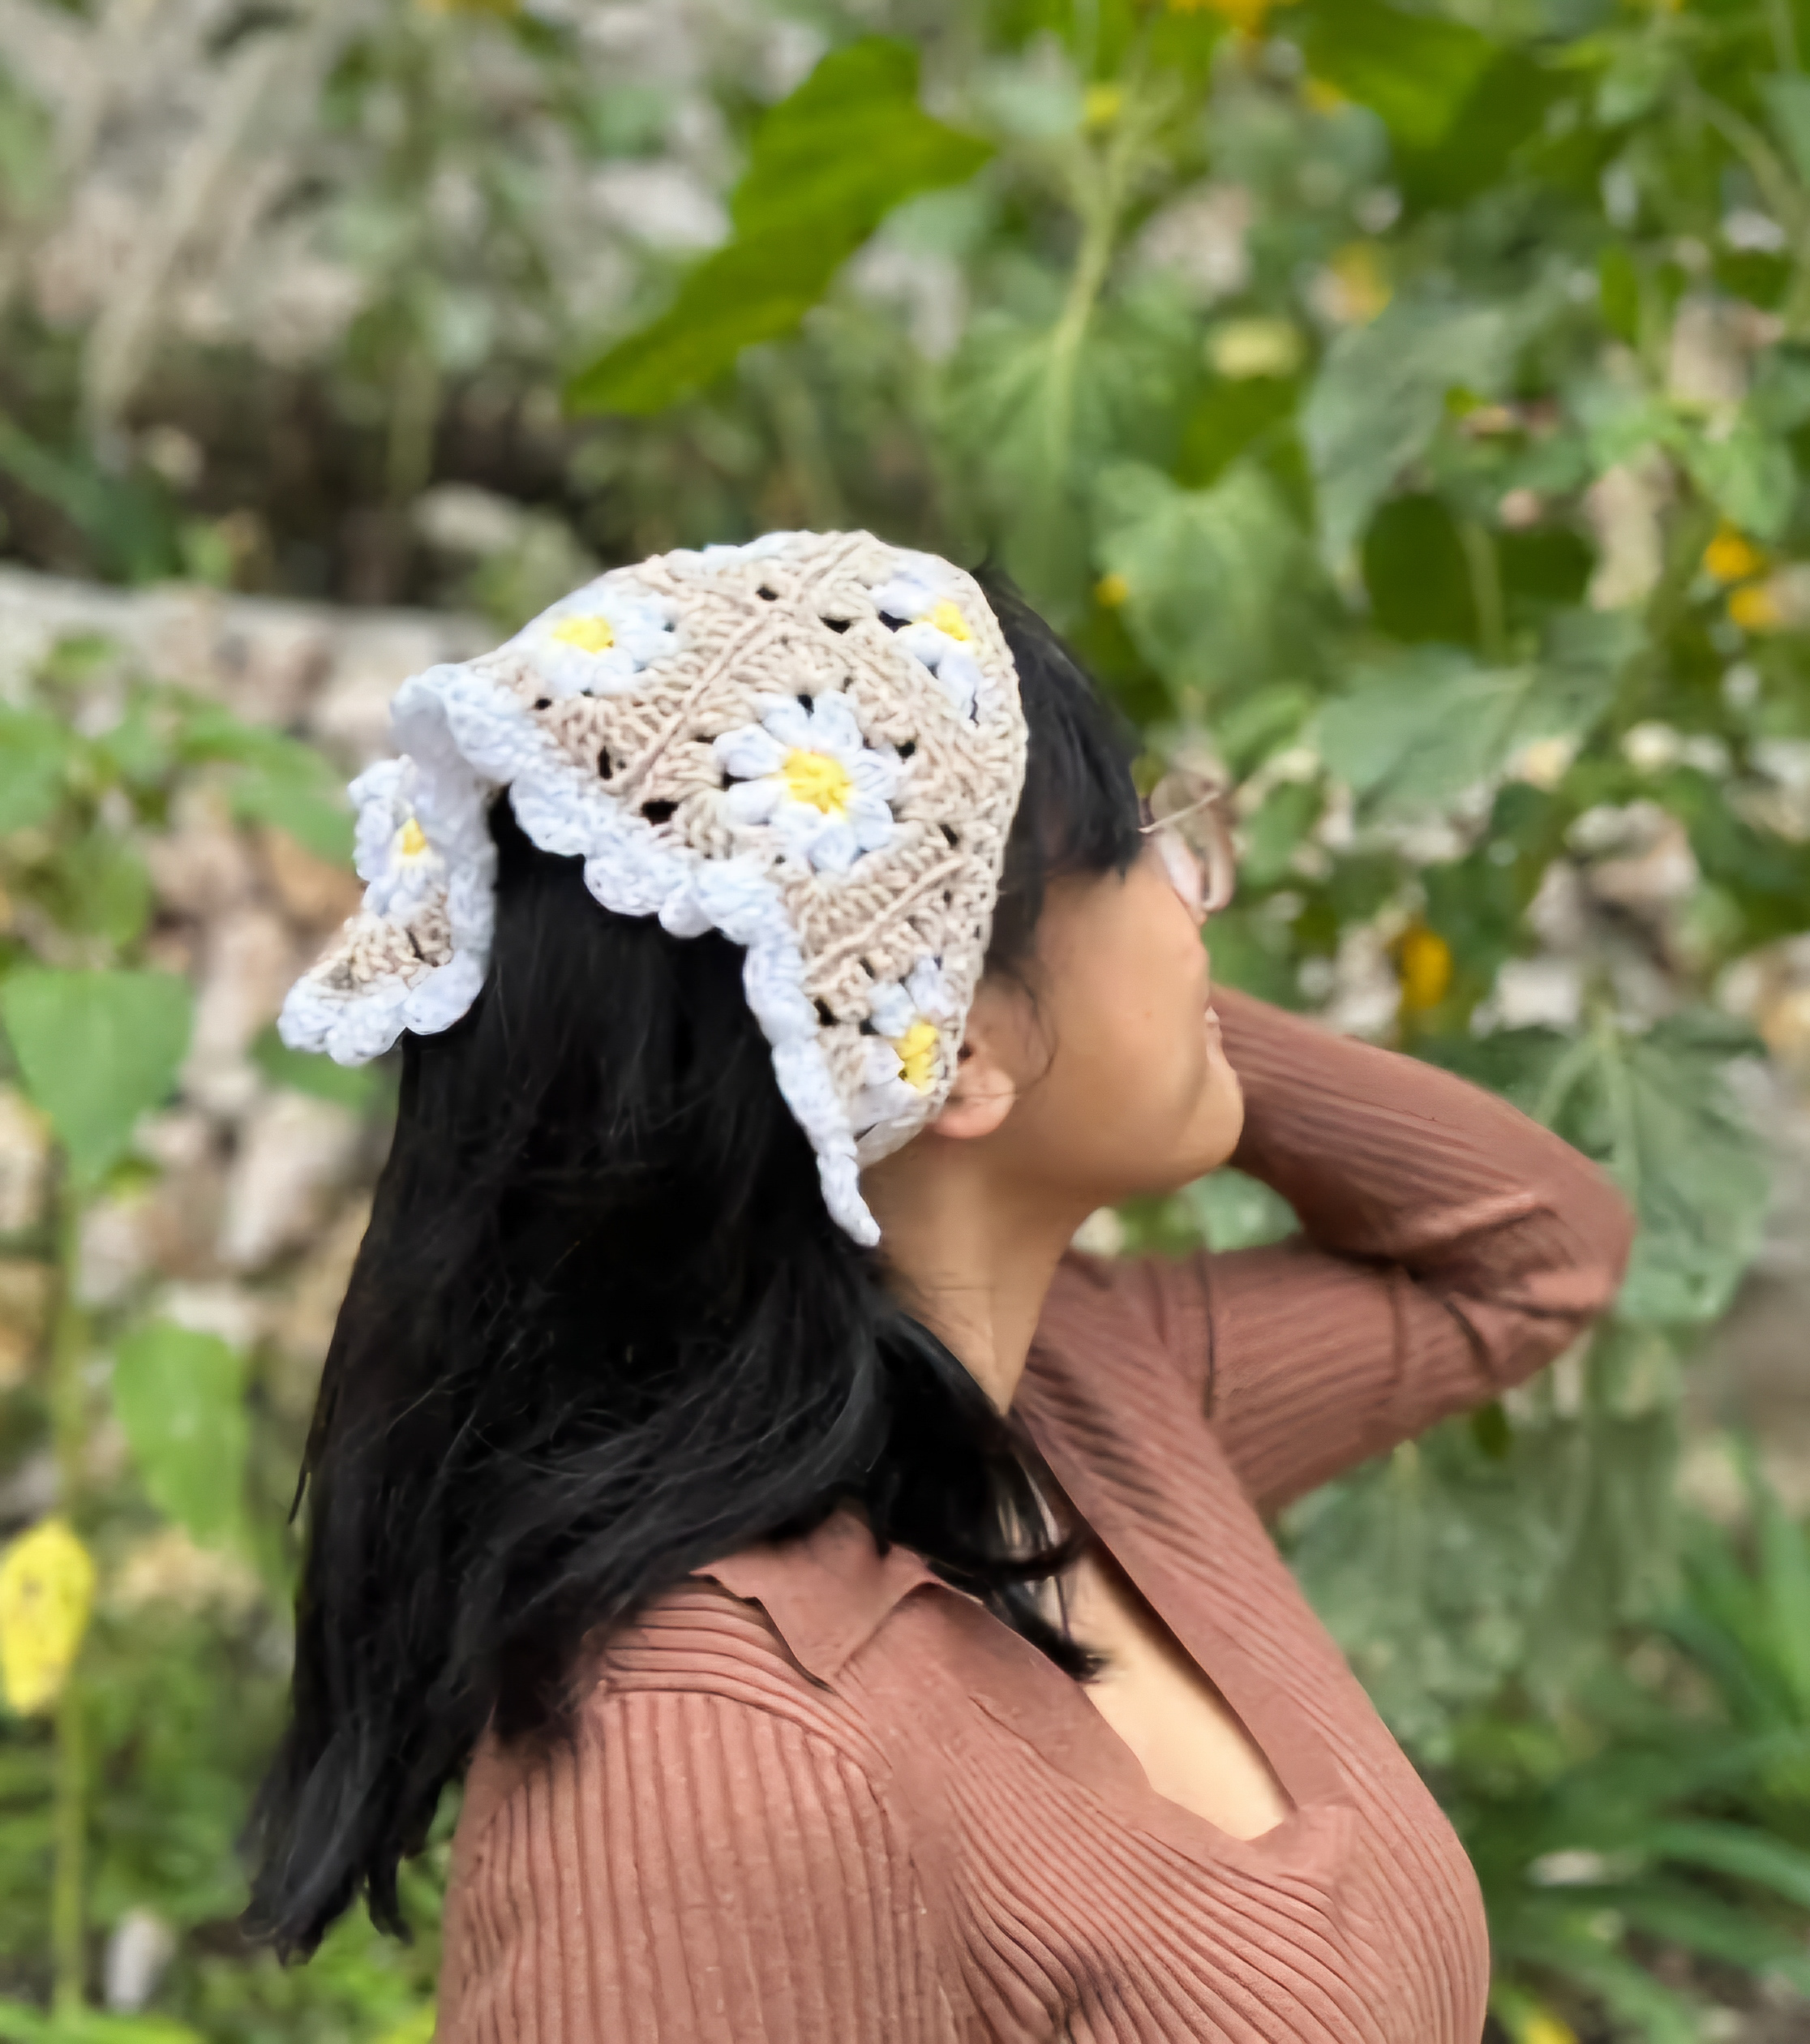
Daisy Flower Bandana
Hello, my Cupids! ☆૮꒰ˊᗜˋ* ꒱ა
if you’ve been longing for a delicate touch of cottagecore in your accessories, this daisy flower bandana might just be your next favorite project. I originally crocheted this as a gift for my older sister, who’s been working abroad. Since it was with me for a week or so, I wore it during a trip to Baguio, Philippines, where the cool breeze and blooming sunflowers made the OOTD fit with it a 10/10. ୭ ˚. ᵎᵎ
It’s soft, light, and full of gentle charm—perfect for sunny mornings, slow afternoons, or moments when you just want to feel aesthetic.
I’m already planning to make another one for myself, and I hope you’ll fall in love with it too. 𝜗𝜚 ⋆˚࿔
Materials Needed
- 3 Yarns of a Main color, White and Yellow (Super recommend Milk Cotton Yarn of 5 ply)
- Hook: 4-5mm
- Scissors/Yarn Cutter
- Darning Needle
Abbreviations & Terminology
- Ch: chain
- Sl st: slip stitch
- SC: Single Crochet
- DC: Double Crochet
- HDC: Half-double Crochet
DAISY SQUARES
Step 1: (Yellow yarn) Do a Magic Ring, Ch 1, and 8 SC inside the ring
Step 2: Sl st into the 1st SC, and then fasten off. Make sure to seal the circle’s ring
Step 3: (White yarn) Make a slip knot on your hook. Attach to the yellow piece with a sl st, then Ch 3
Step 4: Work 3 DC together in the same stitch
Step 5: Ch 2, then work 4 DC together in the next stitch
Repeat step 5 for the remaining stitches
Step 6: Sl st into the beginning of Ch 3, then fasten off
Step 7: (Main color) Create a slip knot onto your hook.
Step 8: Work with each gaps between petals, using sl st to attach.
Step 9: Ch 5, then 3 DC in the same space
Step 10: In the next space, do 3 HDC
Step 11: In the next space, do 3 DC, Ch 2, then 3 DC
Repeat step 10-11 until you reach the end.
Step 12: Place 2 DC in the first space before the Ch 5
Step 13: Sl st to the third chain, then fasten off.
Create 14 more of these squares. (15 total)
DAISY TRIANGLES
Step 1: (Yellow yarn) Do a magic ring, Ch 1, then 4 SC into the ring. Fasten off after
Step 2: (White yarn) Sl st into the yellow piece’s 1st stitch. Ch 4 after
Step 3: Work 4 DC together in the same stitch
Step 4: Ch 2, then work 4 DC together in the next stitch
Repeat step 4 for the remaining stitches.
Step 5: In the final stitch (after the 4 DC), Ch 1 and then DC. Fasten off after
Step 6: (Main color) Sl st to attach in the Ch 1 space
Step 7: Ch 3, then 2 DC in the same space
Step 8: 3 HDC in the next space
Step 9: 3 DC, Ch 2, then 3 DC in the next space
Step 10: 3 HDC in the next space
Step 11: 3 DC in the next space. Fasten off after
Create 5 more of the triangles. (6 total)
SEWING
Step 1: Begin by sewing 3 squares together like a triangle (You may sl st them together, sew normally, or do a mattress stitch). Fasten off after
Step 2: Attach 3 more squares at the bottom
Step 3: Keep adding new rows of squares in the same way, and sew them on
Step 4: After sewing on all 15 squares, sew the 6 triangles below to finish the triangle shape of the bandana
Step 5: (Main color) Attach the yarn with a sl st, Ch 1, then SC along the two sides of the bandana
Step 6: Once you reach the other side, Ch 51 without fastening off
Step 7: Counting back from the hook to the 2nd stitch, start doing 50 SC
Step 8: Start SC along the bottom side of the bandana
Step 9: Once you reach the next corner, repeat step 6-7. Sl st to attach, and fasten off
Step 10: (White yarn) Sl st your yarn onto the corner of your work
Step 11: Ch 1, then SC in the same stitch
Step 12: Skip a stitch, and 5 DC in the next stitch
Step 13: Skip a stitch, then SC
Repeat step 12-13 for the rest of the border.
˚₊‧꒰ა❤︎໒꒱ ‧₊
and you’re done, my Cupid! Great job, and feel free to create more after a lot of practice!
Video Tutorial by: cosybearcrochet