Simple Messenger Bag
Hello, my Cupids! ☆૮꒰ˊᗜˋ* ꒱ა
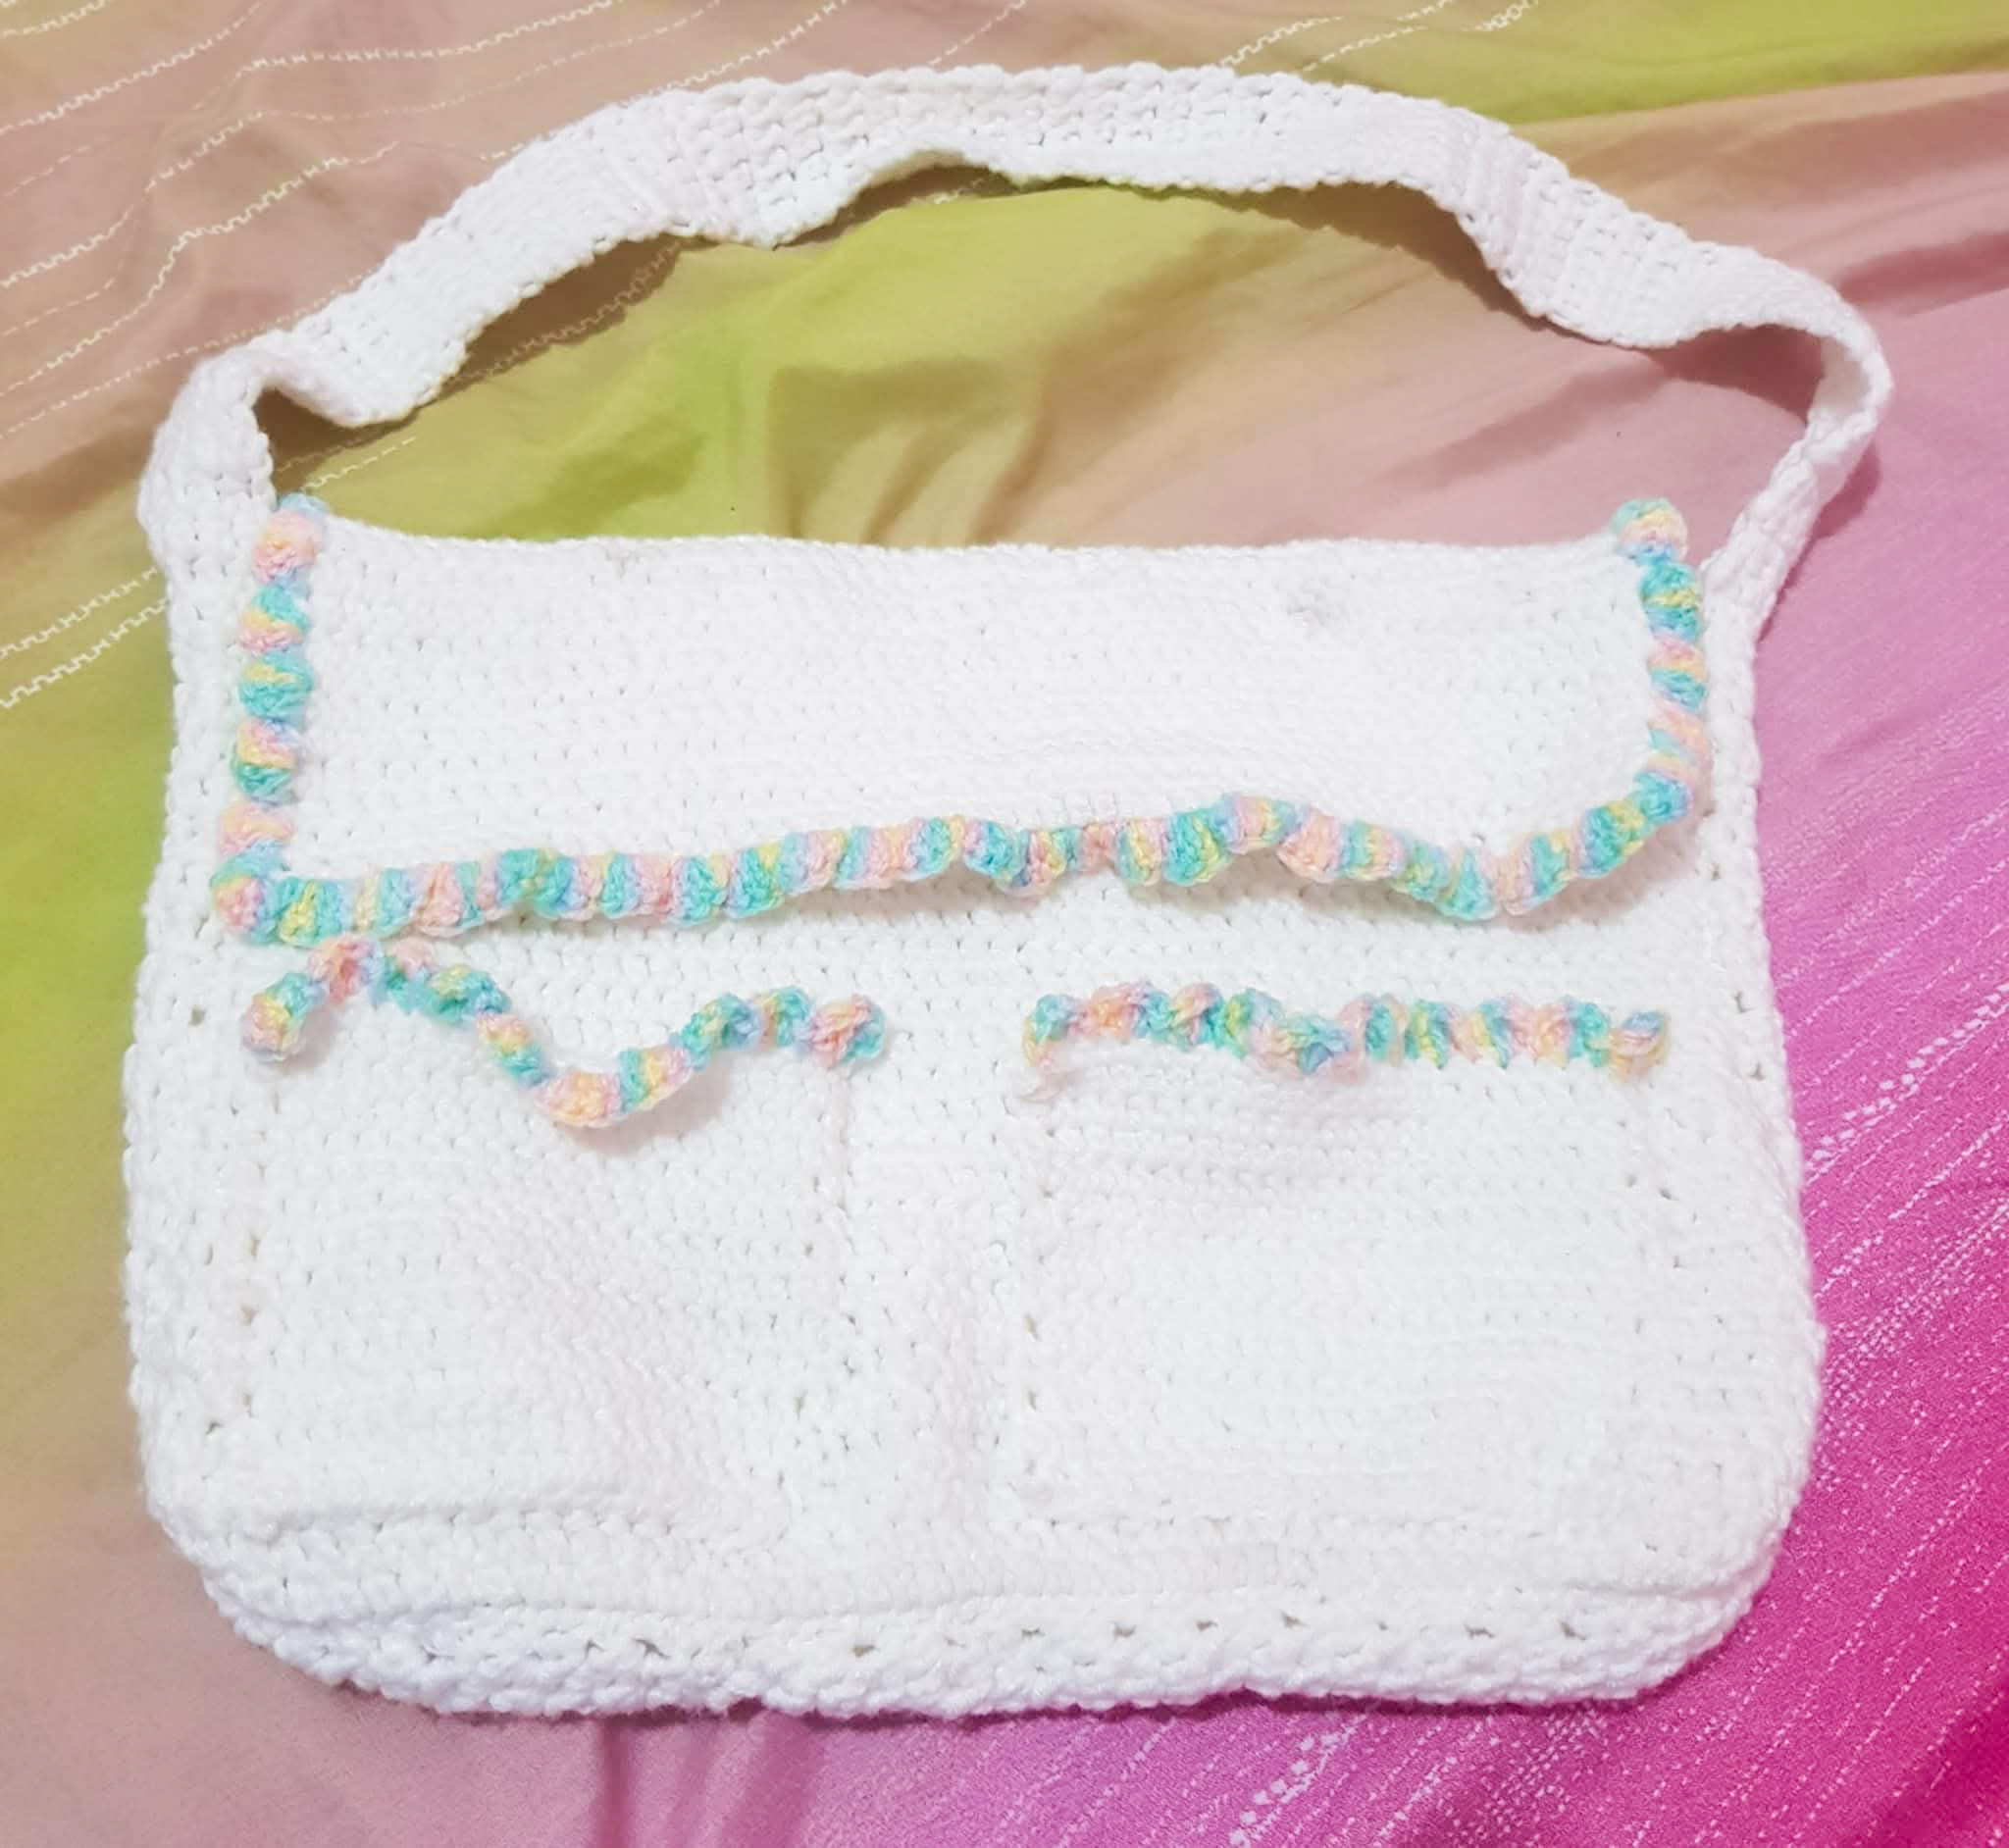
Another mention goes to a super cute and practical project—a Simple Messenger Bag that was actually made by my younger sister’s other friend. She sent me a photo of it, and I had to share it here because it’s really simple, stylish, and cute with the rainbow edges. ⸜(。˃ ᵕ ˂ )⸝♡
I haven’t tried crocheting a messenger bag myself yet, but seeing this one is seriously tempting me to start. It’s the kind of project that’s both fun, customizable to your liking, and functional—perfect for carrying your essentials or gifting to someone special.
Take a peek at her creation, get inspired, and maybe even start your own bag journey with this beginner-friendly pattern! ✶⋆.˚
Materials Needed
- Yarns of your choice (Super recommend Milk Cotton Yarn of 5 ply)
- Hook: 4-5mm
- Scissors/Yarn Cutter
- Darning Needle
Abbreviations & Terminology
- Ch: chain
- Sl st: slip stitch
- SC: Single Crochet
- DC: Double Crochet
It’s entirely up to you how you want to customize the messenger bag, with colors, and having pixel designs on the pocket like in the tutorial! Feel free to learn more from the video if you want to do designs.
Step 1: Do a slip knot. Chain the width you want for the front & back panel of the bag, and then the strap. (In the tutorial, the width was 36 stitches for the front & back, and then the strap was 6 stitches)
Step 2: Chain 1 more to do a turning chain. Now, flip your work, skip the turning chain, and make 1 SC into every stitch for the first row
Step 3: Do this until you reach your desired length with the front, back, and strap. The back panel should be a little longer as it includes a flap, and the strap should be long enough to wrap around the panels as well. (In the tutorial, the lengths of the front panel was 29 rows, back panel was 40 rows, and the strap was 150+ rows)
Step 4: To attach the ends of the straps, Sl st them together then fasten off. Make sure the front & back panel has a long length of yarn when cut to be able to sew them together.
For the pockets, if plain, the width and length is 18 stitches and 13 rows
ASSEMBLE
Step 1: Sew the sides of the front piece to one side of the strap
Step 2: Sew the sides of the back piece to one side of the strap
Step 3: Flip it inside out (if you worked on the wrong side while sewing)
Step 4: Sew the pockets onto the bag.
(OPTIONAL) SHELL AROUND FLAP & POCKETS
Step 1: (Any color) Attach the yarn at the corner of the flap with a knot
Step 2: Pull up a loop and Ch 3. Work 4 DC in the same space
Step 3: Skip 1 space, and Sl st into the next space
Step 4: Insert 5 DC in the same space, skip 1, and Sl st into the next space. Repeat all around the flap and fasten off at the end.
˚₊‧꒰ა❤︎໒꒱ ‧₊
and you’re done, my Cupid! Great job, and feel free to create more after a lot of practice!
Video Tutorial by: mahum 🎀