Newjeans Binky Bong
Hello, my Cupids! ☆૮꒰ˊᗜˋ* ꒱ა
This one’s straight from the heart of a kpop fan—today I’m sharing a pattern for a Binky Bong keychain, inspired by none other than my favorite group, NewJeans! As someone who absolutely adores them, I thought it would be so special to crochet something that represented my love for their music, style, and overall vibe. ૮₍ ´ ꒳ `₎ა
This keychain is small, fun, and the perfect little tribute to our girls. Whether you’re attaching it to your bag, photocard binder, or just keeping it close as a fan-made token, it’s such a cute way to show NewJeans love.
Wanna do a token for NewJeans as well? Then let’s go! ๋࣭ ⭑⚝
Materials Needed
- White yarn (Milk Cotton is recommended)
- Hook: 3.5 mm
- Scissors/Yarn Cutter
- Safety eyes (if none, you can use black yarn)
Abbreviations & Terminology
- Ch: chain
- Sl st: slip stitch
- SC: Single Crochet
- inc: Increase
- dec: Decrease
Round 1: Make a magic ring, and work 8 SC. Tighten the hole of the ring.
Round 2: Inc in every stitch all the way around
Round 3-6: SC in every stitch all the way. Sl st after and cut the yarn.
Make one more, but do not cut the yarn at the end.
Round 7: Grab the last piece, and connect it by SC to the current piece through the hole of the Sl st. Continue SC around (including the other piece attached).
Round 8-12: Continue SC around.
Round 13: 4 SC, then dec. Repeat all around.
Round 14: 3 SC, then dec. Repeat.
Round 15: 2 SC, then dec. Repeat.
Round 16: 1 SC, then dec. Repeat.
Start stuffing the piece at this point. You can also start attaching the safety eyes at this point.
Round 17: Dec 6
You can cut the yarn here, and start sewing the 6 stitches closed. Hide the loose yarn as well.
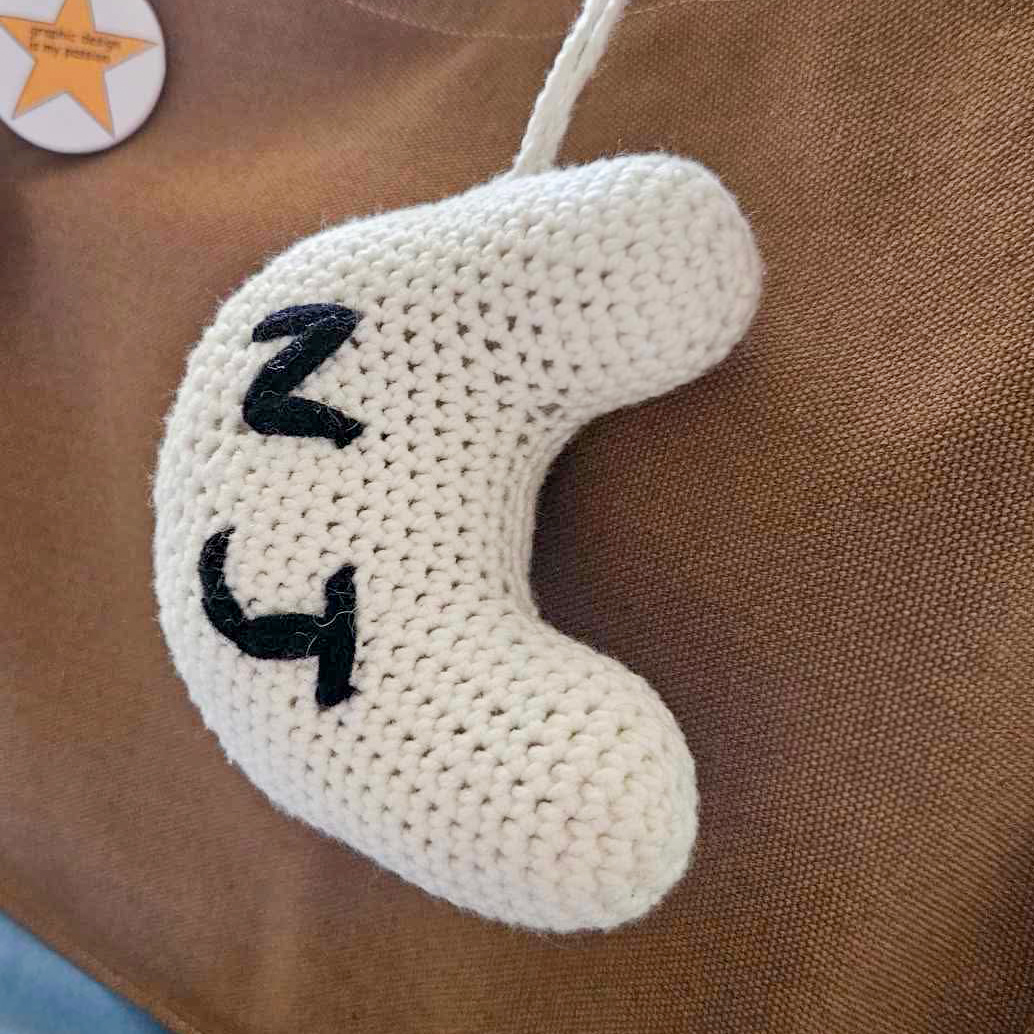
Incase you don’t have safety eyes, you can also sew on it with black yarn (like I did, and I decided to make the initial letters of NewJeans).
Now, you can add a keychain holder, or make your own by making a chain attached.
˚₊‧꒰ა❤︎໒꒱ ‧₊
and you’re done, my Cupid! Great job, and feel free to create more after a lot of practice!
Video Tutorial by: ssarasart 🍀